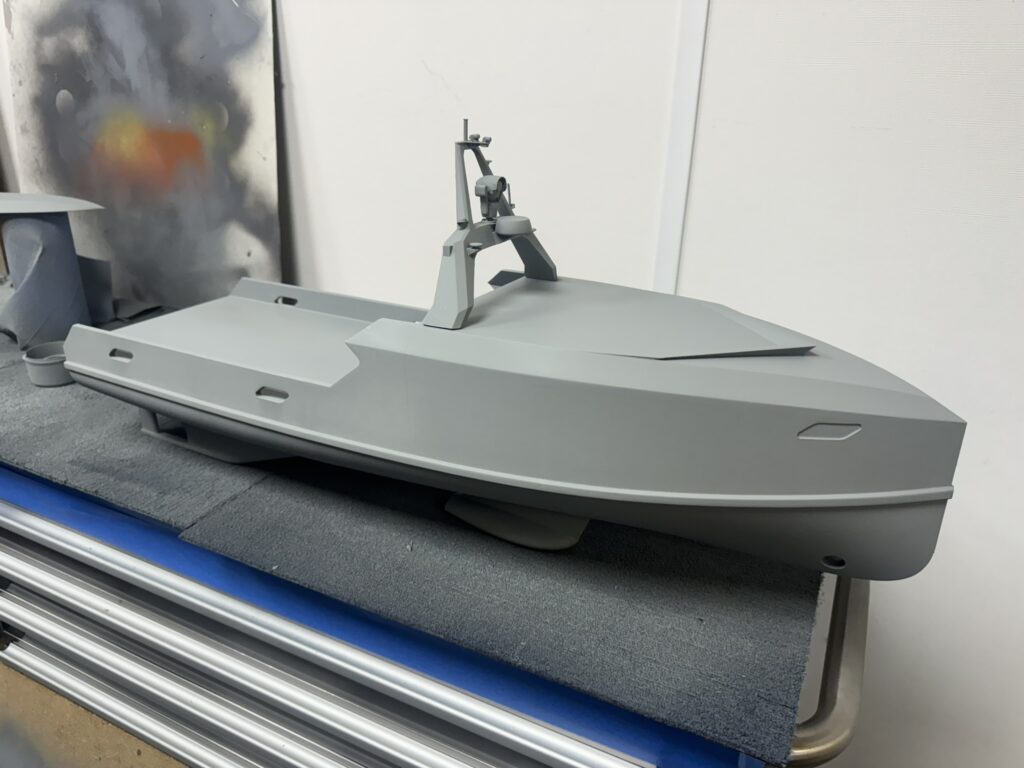
One of our corporate clients (a boatbuilder) got in touch with us to provide urgent 3D printing services! They had been working on a 1:20 scale model of a 15 metre boat (that’s 75cm, or 30″!), aiming to showcase it as the focal point at an upcoming trade show. Unfortunately, they ran into regular print failures on their resin printer, possibly due to the challenging dimensions of the model. With the deadline approaching, they turned to us for a solution, and we jumped at the chance to tackle the project.
Understanding the Challenges: Resin vs. FDM Printing for Large Models
For intricate projects, resin 3D printing offers high levels of detail and outstanding surface finish, which makes it perfect for small parts or highly detailed miniatures. However, resin printers can struggle with large prints for a few reasons:
- Poor dimensional Stability: Larger resin prints are susceptible to warping, layer separation, or even mid-print collapses due to resin’s curing properties. When the model is printed in multiple sections, the mating faces are rarely truly flat, leading to large joint lines that require skilled and extensive finishing.
- Increased Risk of Failure: Resin printing large parts typically involves large suction forces between the print and the bed, which in turn increases the rates of failure. This is especially the case if the print settings are not 100% dialed, or if this isn’t acounted for when placing and slicing the model.
Given the scale and of this model boat, Using our top-end FDM (fused deposition modeling) printer was a no-brainer for this project.
Slicing and Printing the Model
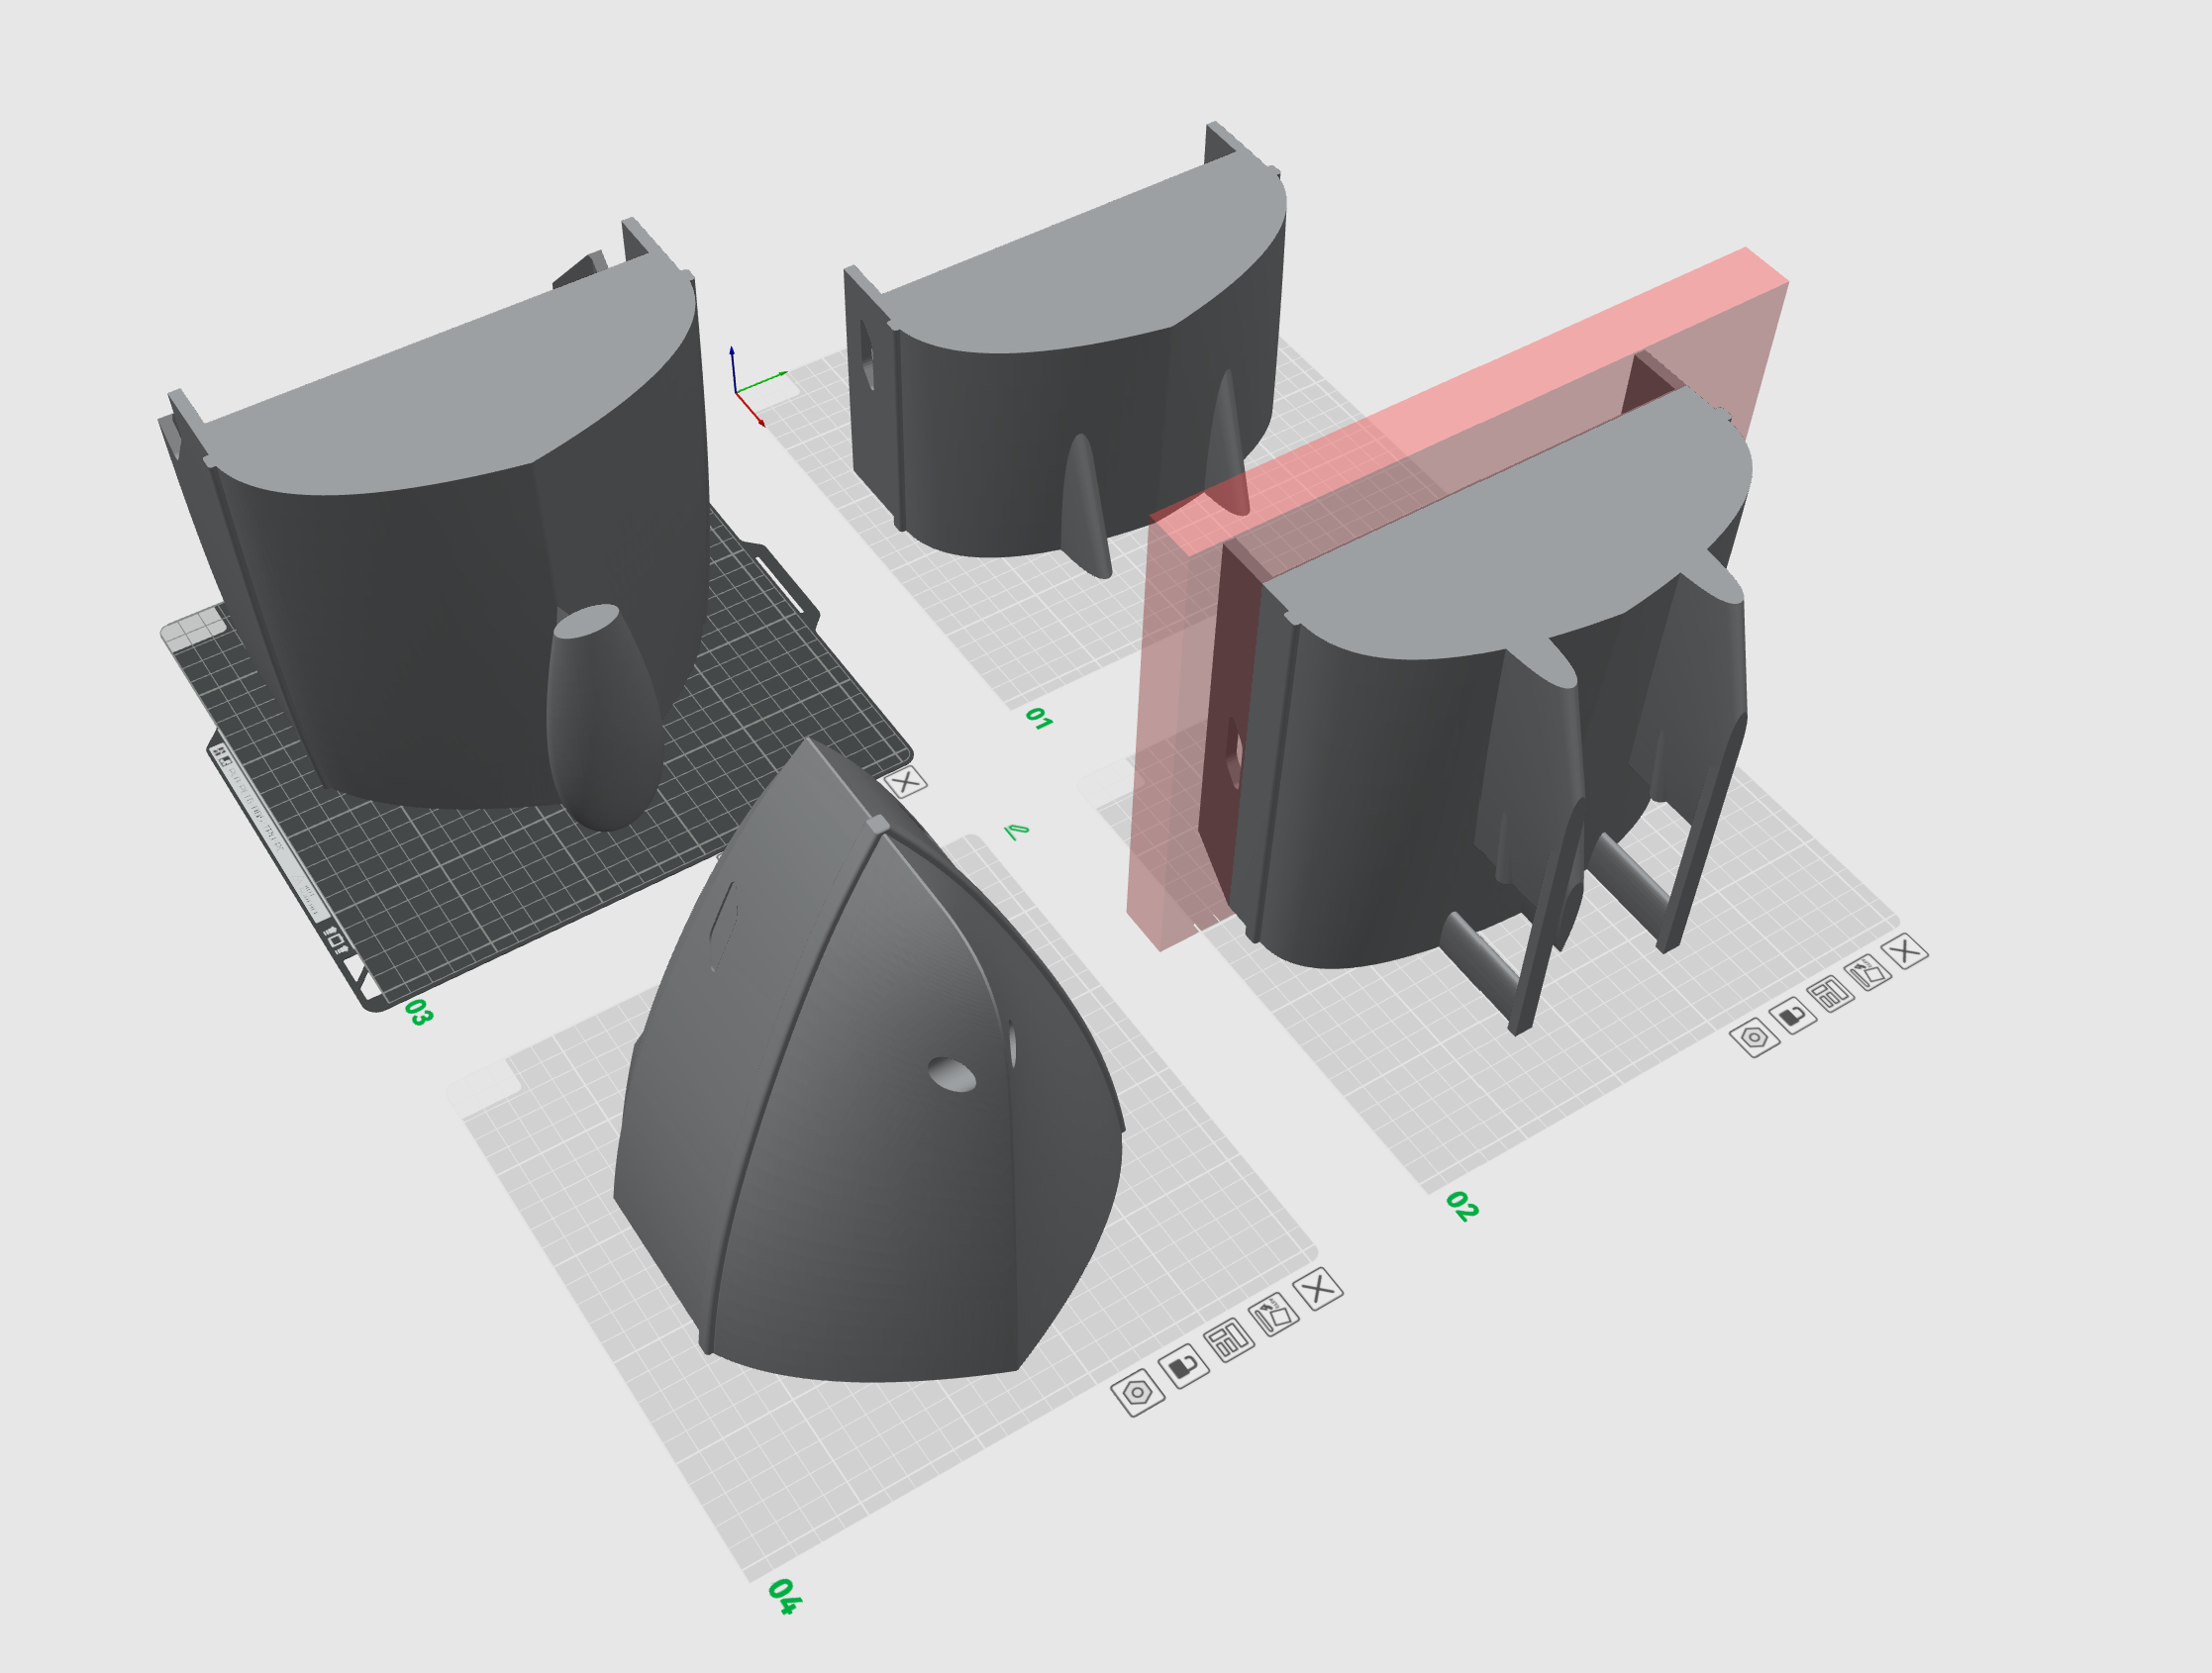
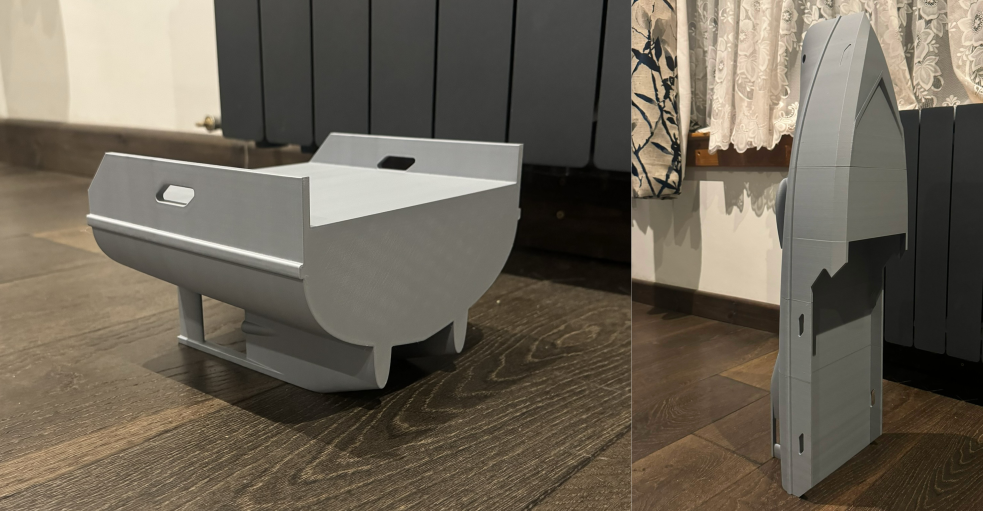
Due to the model’s large size, we needed to split it into four manageable sections:
- Splitting the Model: We divided the boat into four sections, optimizing the cuts at natural separation points to minimize the finishing requirements later. This step ensured that each part could fit within our printer’s build volume, allowing us to maintain the desired detail without risking failed prints. This approach also allowed us to orient each section in the most suitable way to minimize supports (i.e. waste material) and maximize surface quality.
- Choosing the Right Material: The material was specified by us, but sourced and free-issued to us by the client through their supply chain. For ease of printing and post-processing, we specified PLA in a colour as close as possible as the required finished products, minimizing the number of paint coats. PLA is a common choice for large, non-functional models since it’s easy to print, sand, and finish, but also due to the fact it’s plant-based and generally compostable.
- Slicing and Printing Each Section: Each section was sliced with adaptive layer thickness: this technique allows the use thick printing layers where these wouldn’t be noticed, while refining the layer height on curved or shallow sections. Although each print took several hours, the generally reliable output of an FDM printer in experienced hands (and a lot of late-night printing!) allowed us to complete the project within the client’s very tight timeline.
Handing it Off to a Partner for Post-Processing
Once all sections were printed, we delivered the parts to a fellow craftsperson (who is also the person that put us in contact with this client), who took over the assembly and finishing process with our support:
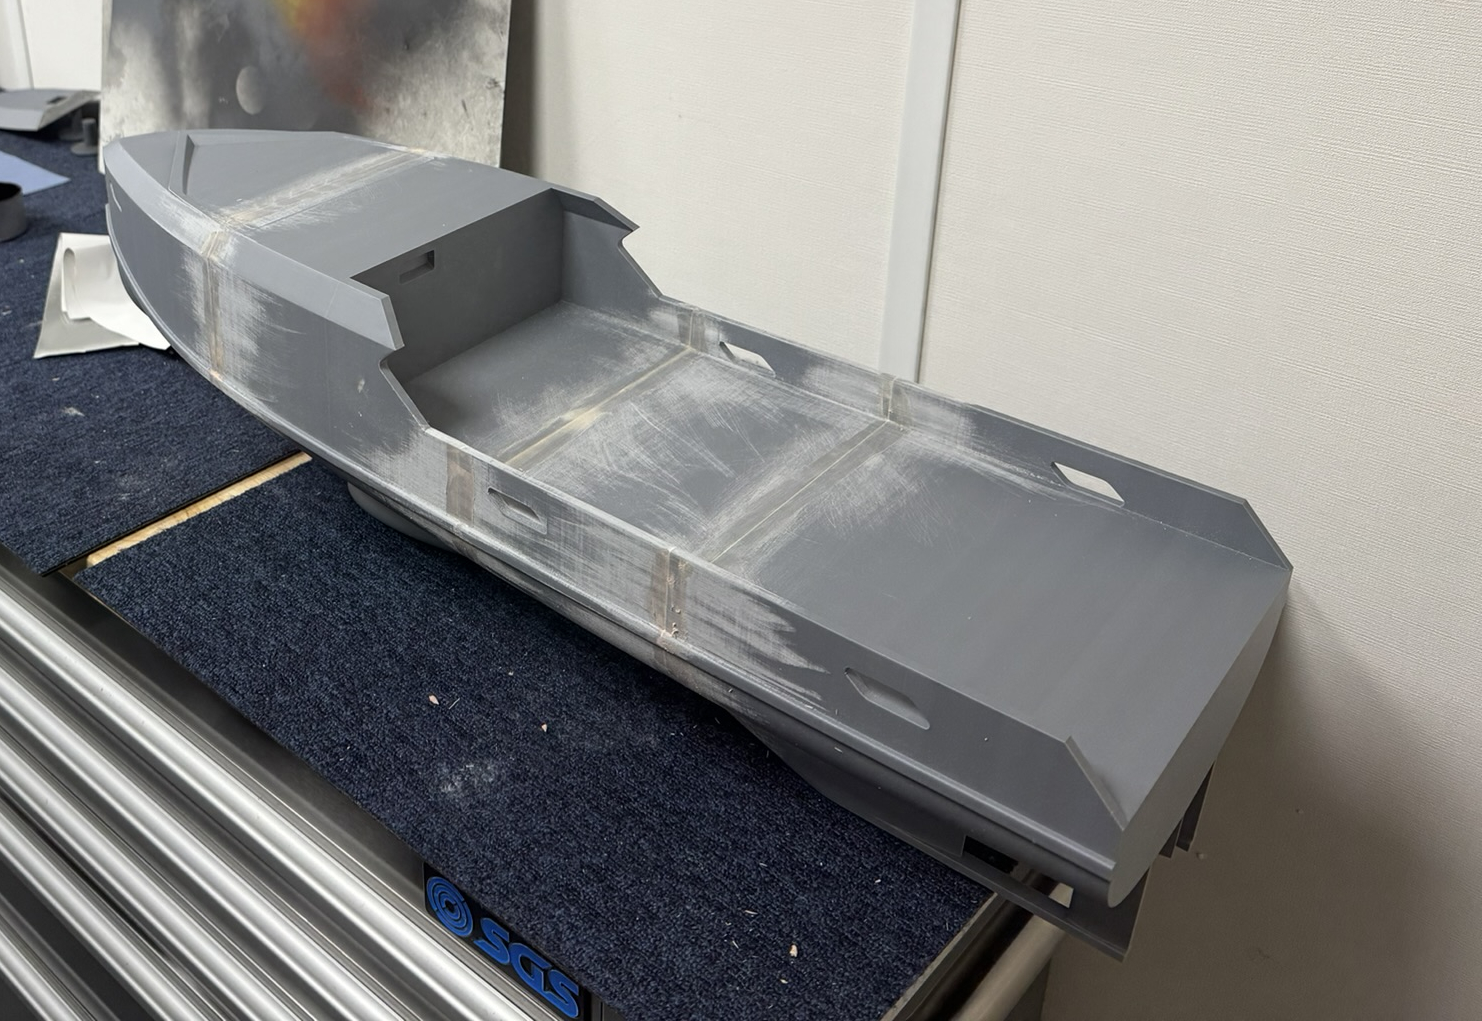
- Gluing and Joining: Epoxy adhesive was used to bond each section ensuring the joints were stable, aligned and as thin as possible.
- Filling and Sanding: To achieve a smooth, seamless surface before painting, they filled the joints with car body filler and carefully sanded the whole surface lightly, making any seams virtually invisible. Sanding also helped to prepare the surface for a smooth paint finish.
- Painting the Model: Finally, the boat was painted, bringing out the fine details and adding a realistic touch. . At this stage the more intricate parts and appendages printed by the client were also painted to match. The finished result is an impressive, large-scale, professionally-manufactured model boat.
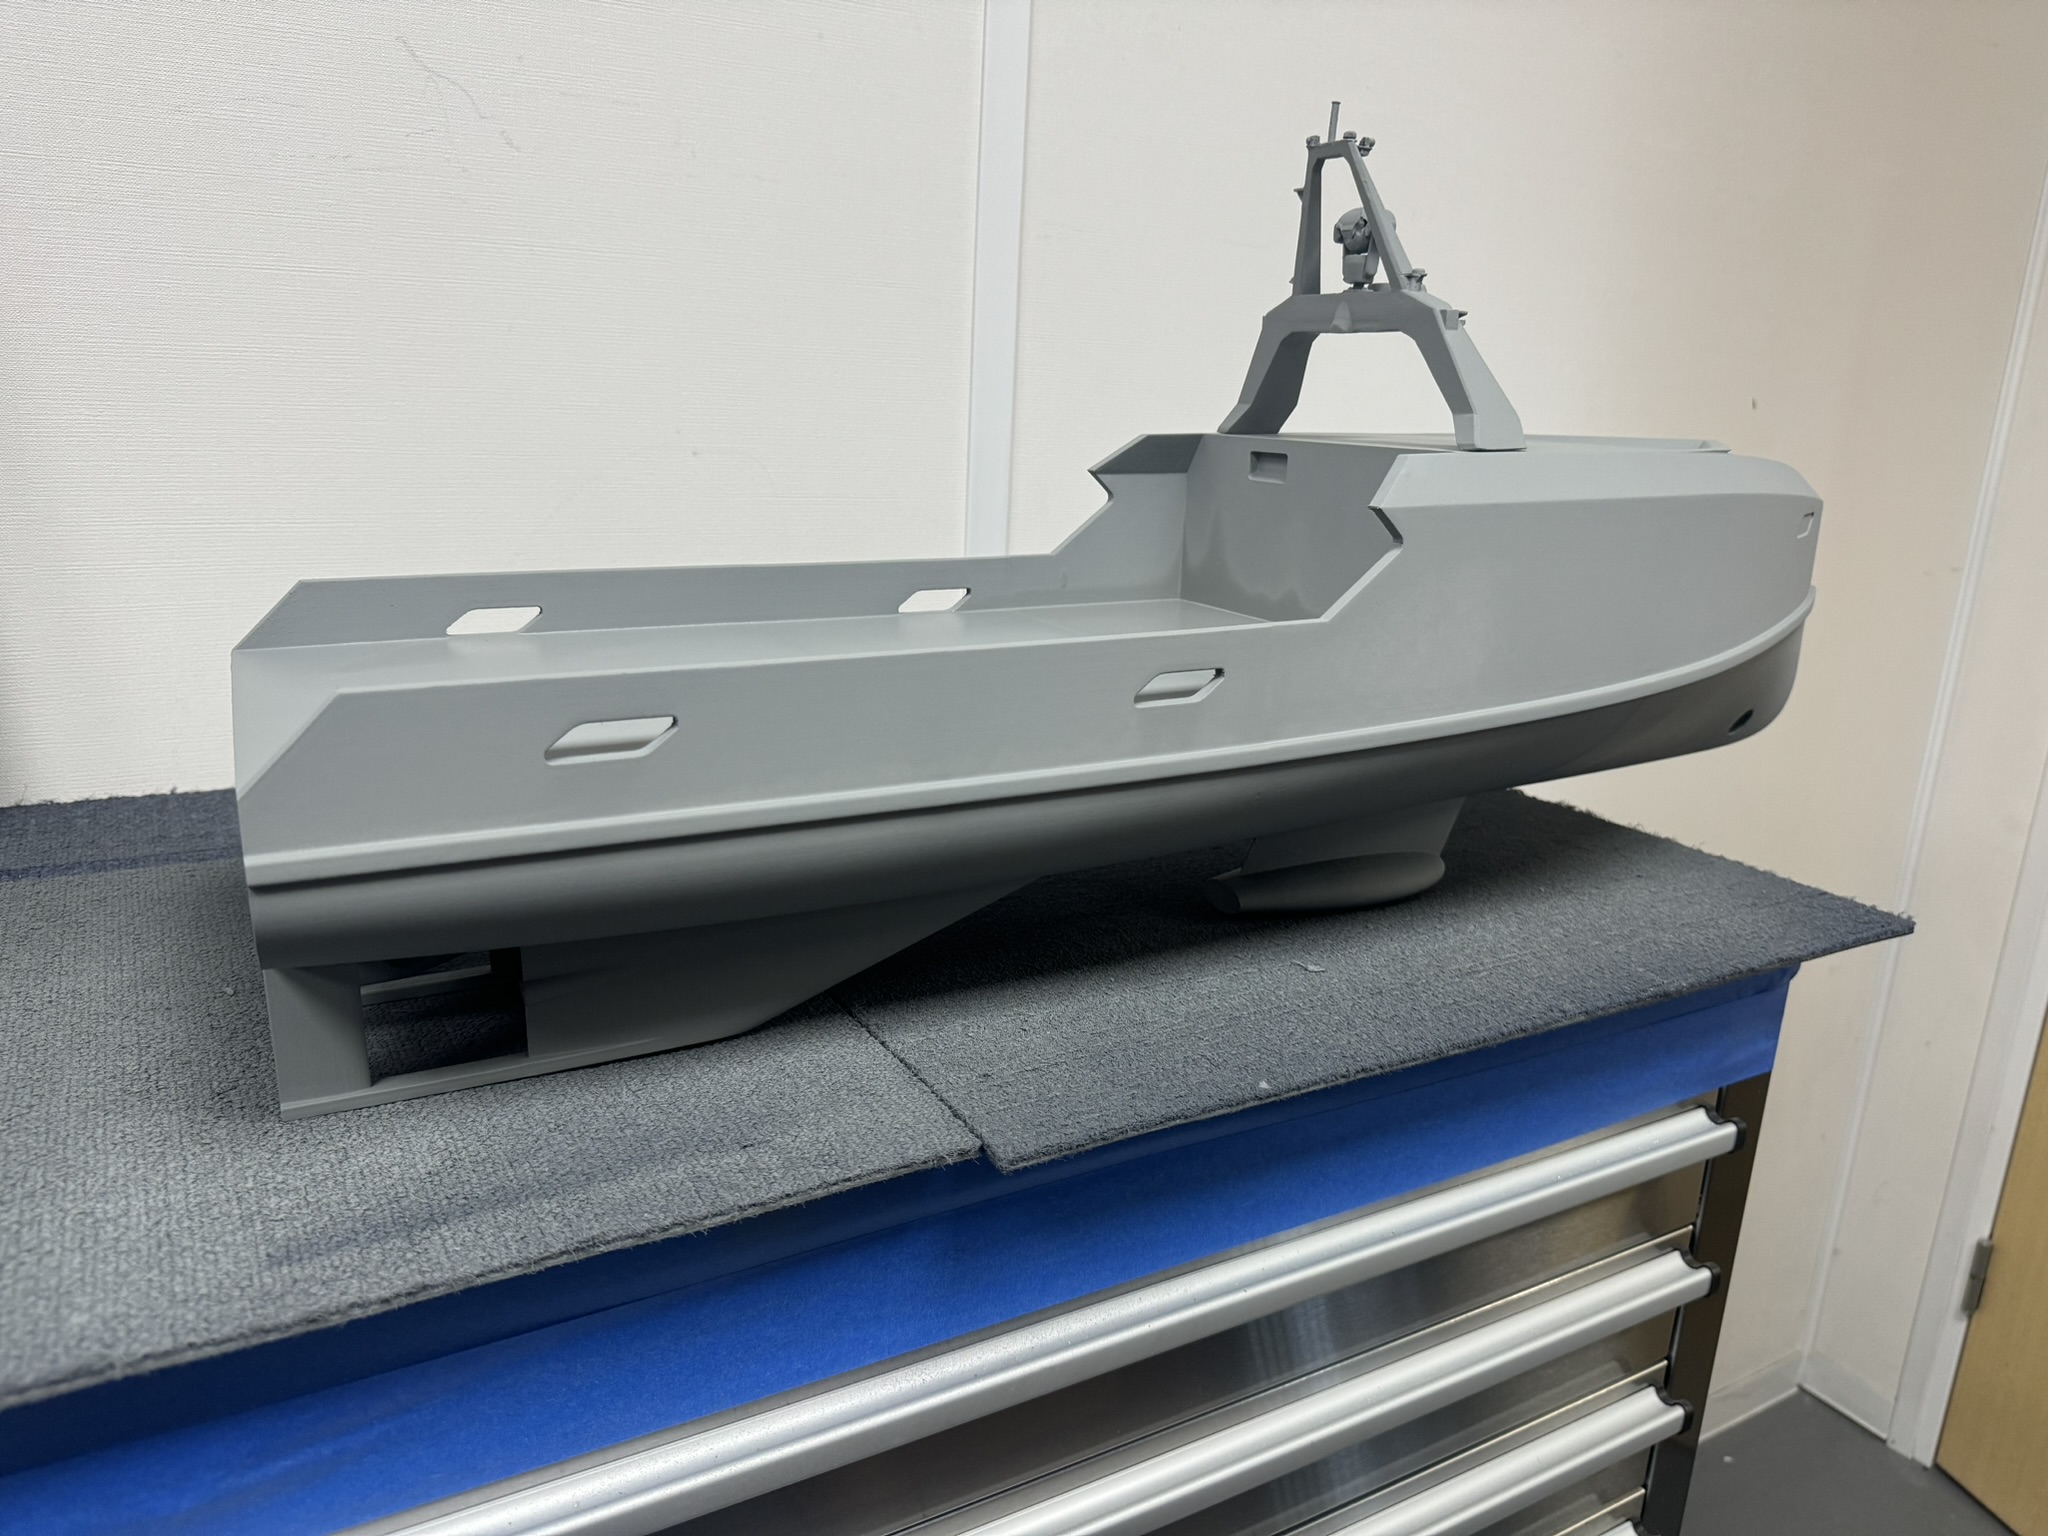
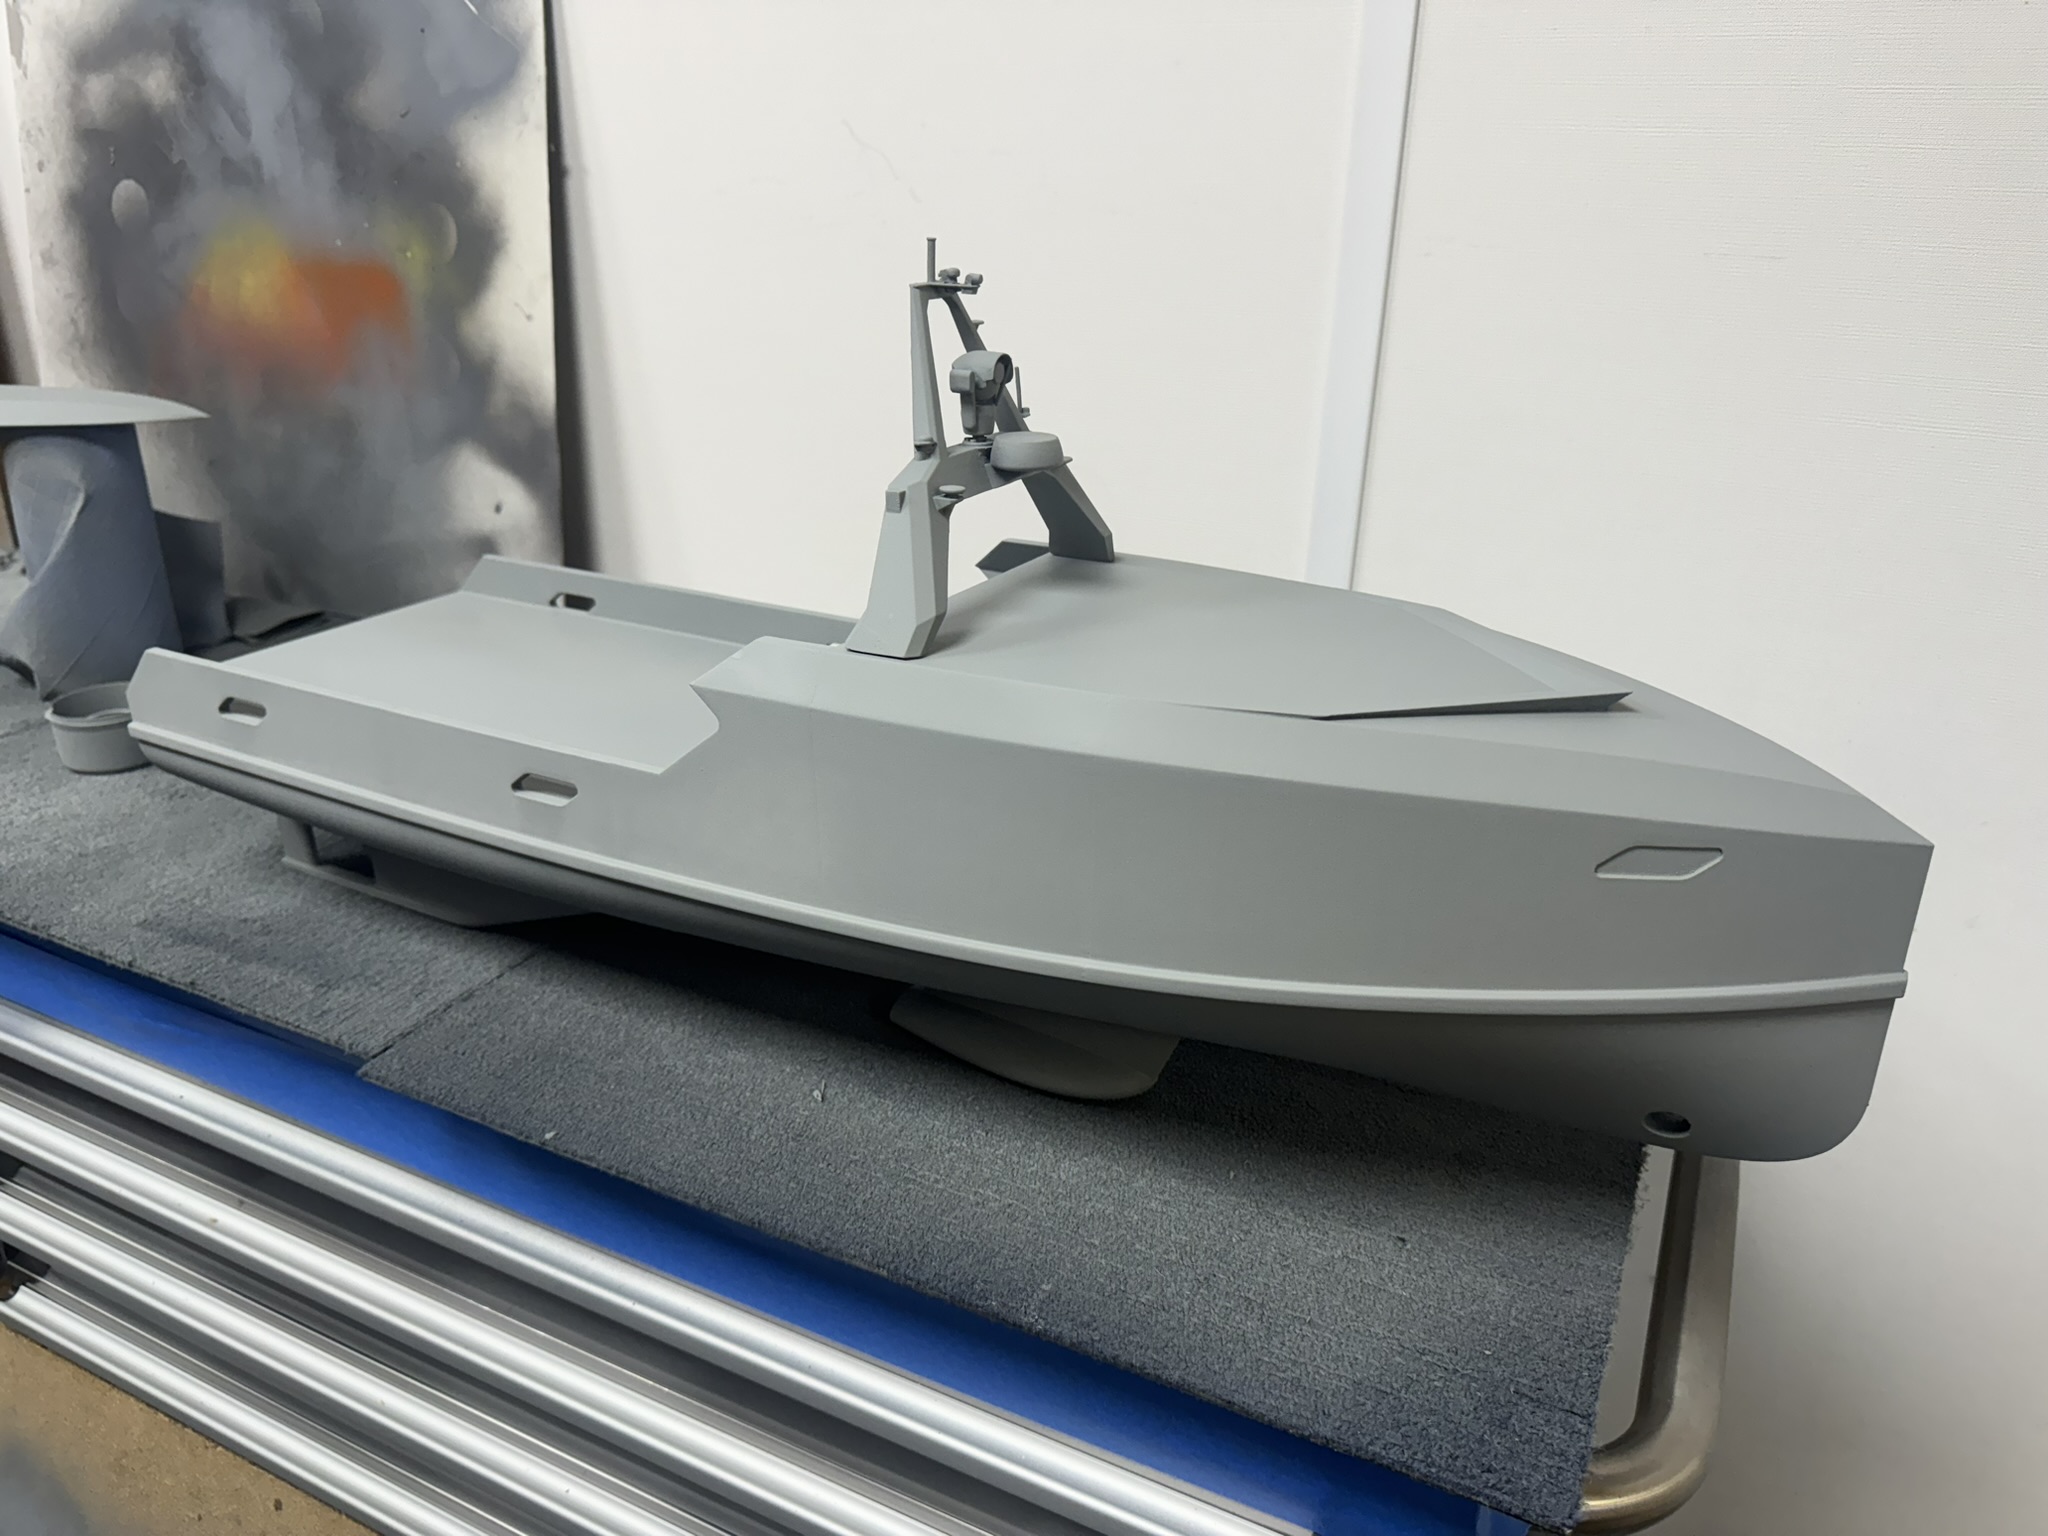
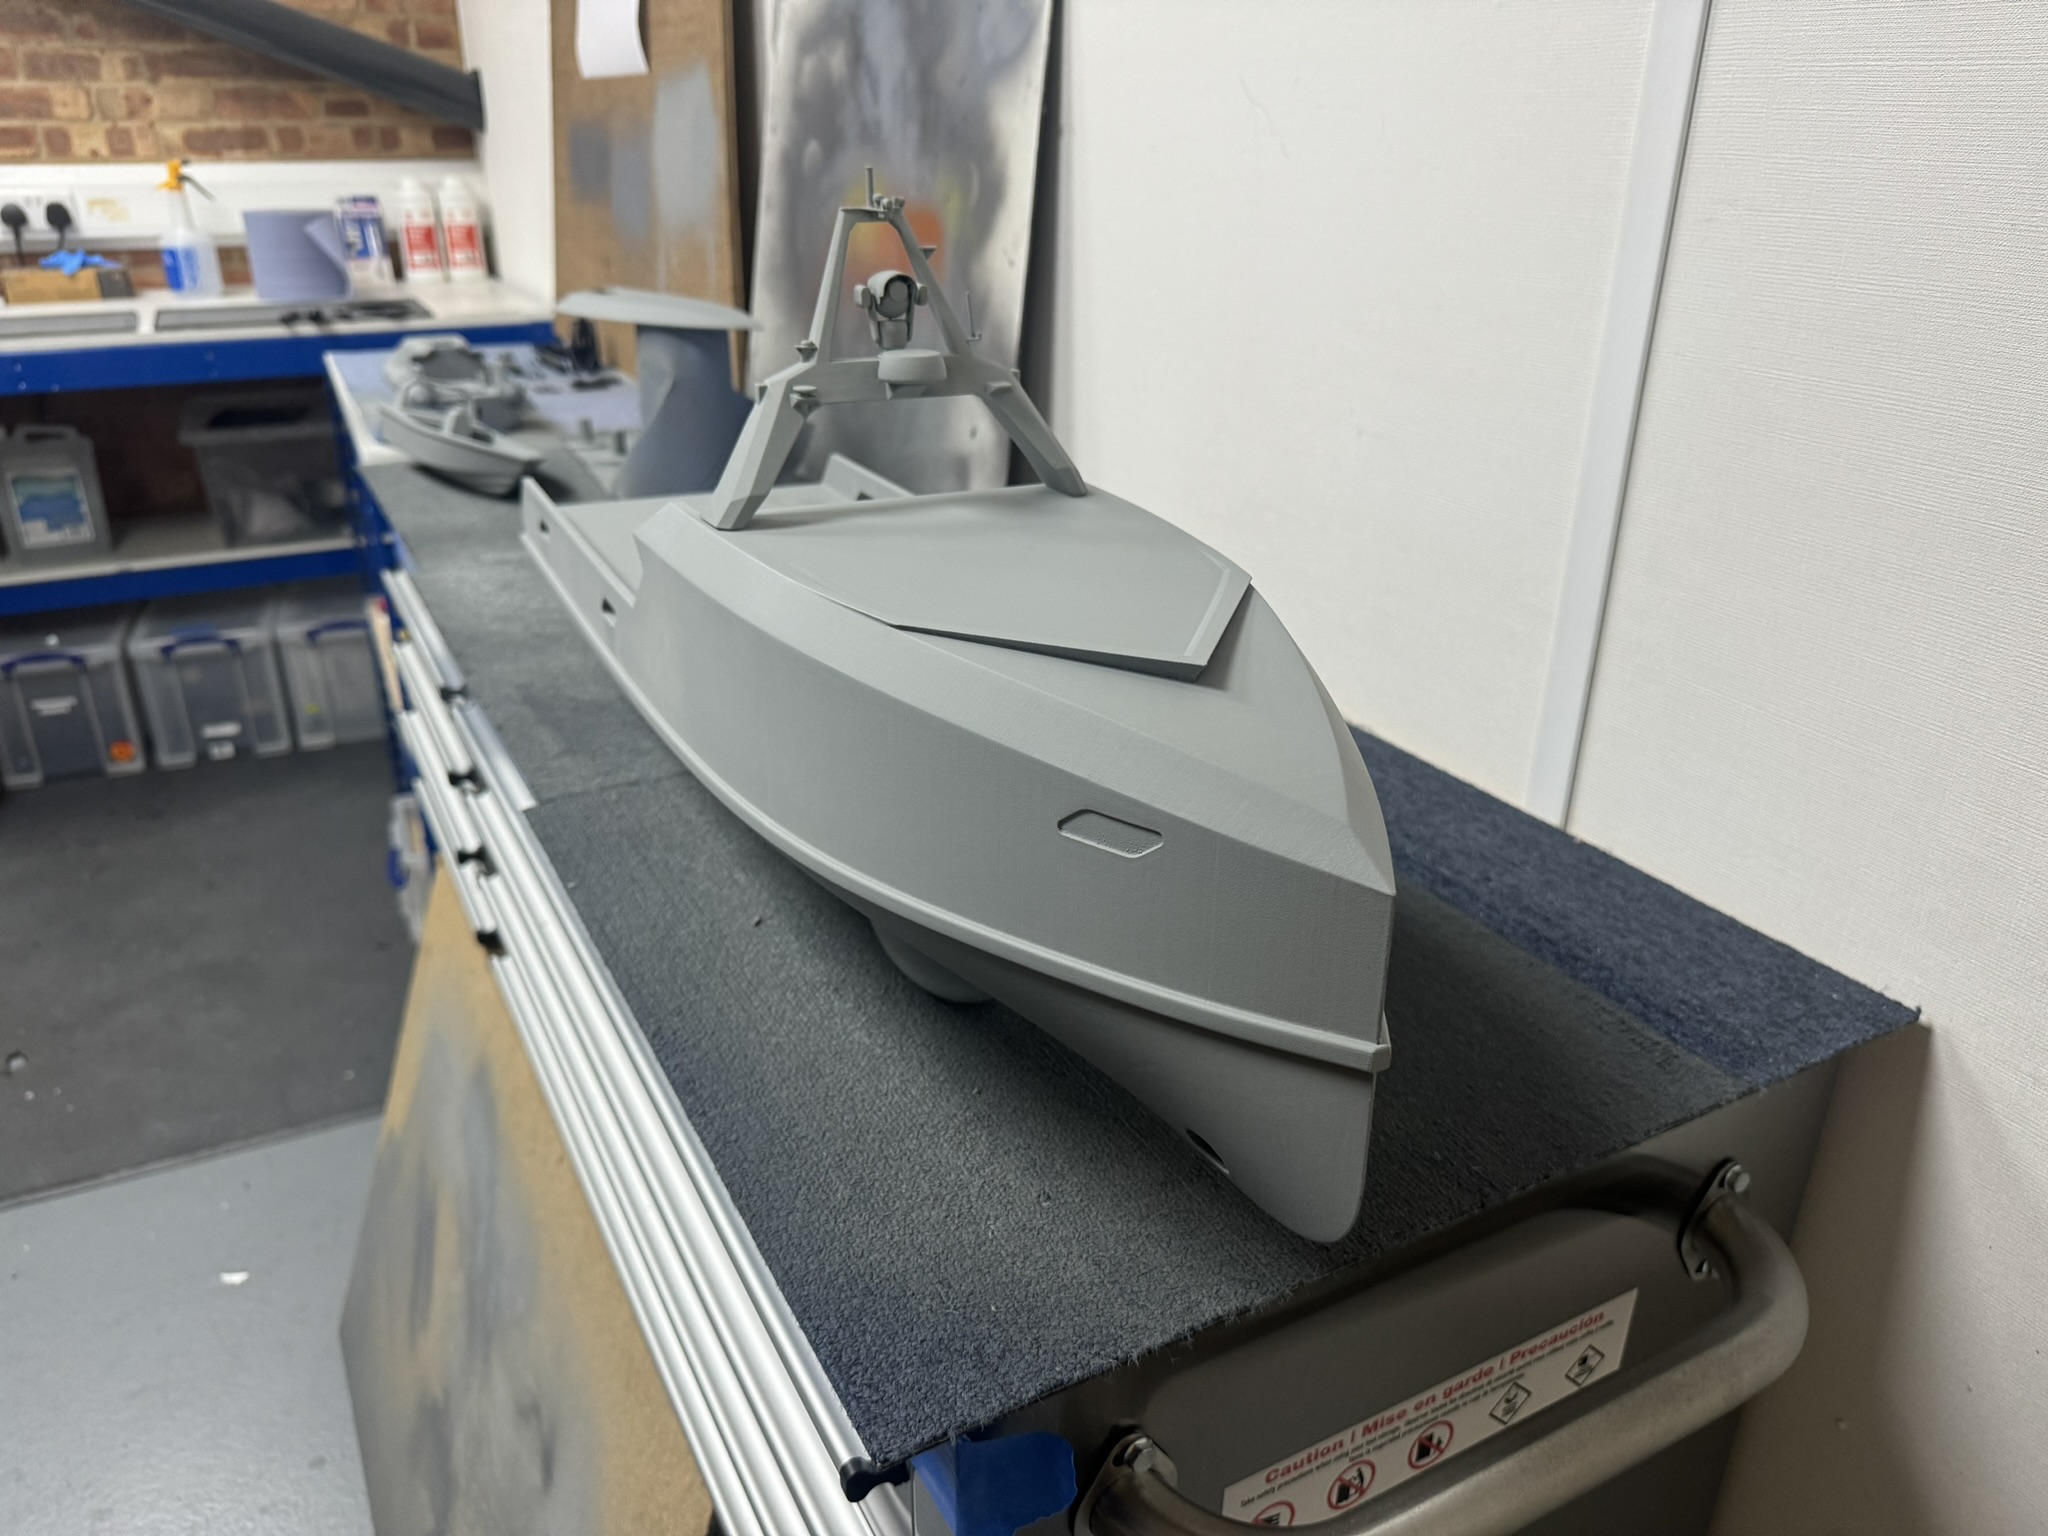

- Decals: The client finally applied their decals and branding. While we aren’t allowed to share these photos, we can tell you the model looks impressive!
The Final Result and Lessons Learned
The completed model was a testament to teamwork and adaptability between the client and a network of local craftspeople, resulting in a high-quality finish that exceeded expectations. Here are a few lessons we took from this project:
- Adaptability in 3D Printing: The right printer and material choice for a project are crucial, especially when size and detail come into play. Clearly the availability of FDM for the larger components and resin printing for the appendages came together beautifully here.
- A Well-Tuned Printer is More Reliable Than We Thought: These boat sections were by far the largest prints we’ve run, pushing into all 3 dimensions of the printer envelope. Nonetheless, everything was printed without any issue whatsoever, even when replacing filament spools mid-print
- Post-Processing Is Key: With proper assembly and finishing, even a sectioned print can appear as a single, seamless piece.
This project also quiclky led to another order from the same client (for a smaller model in two sections this time):
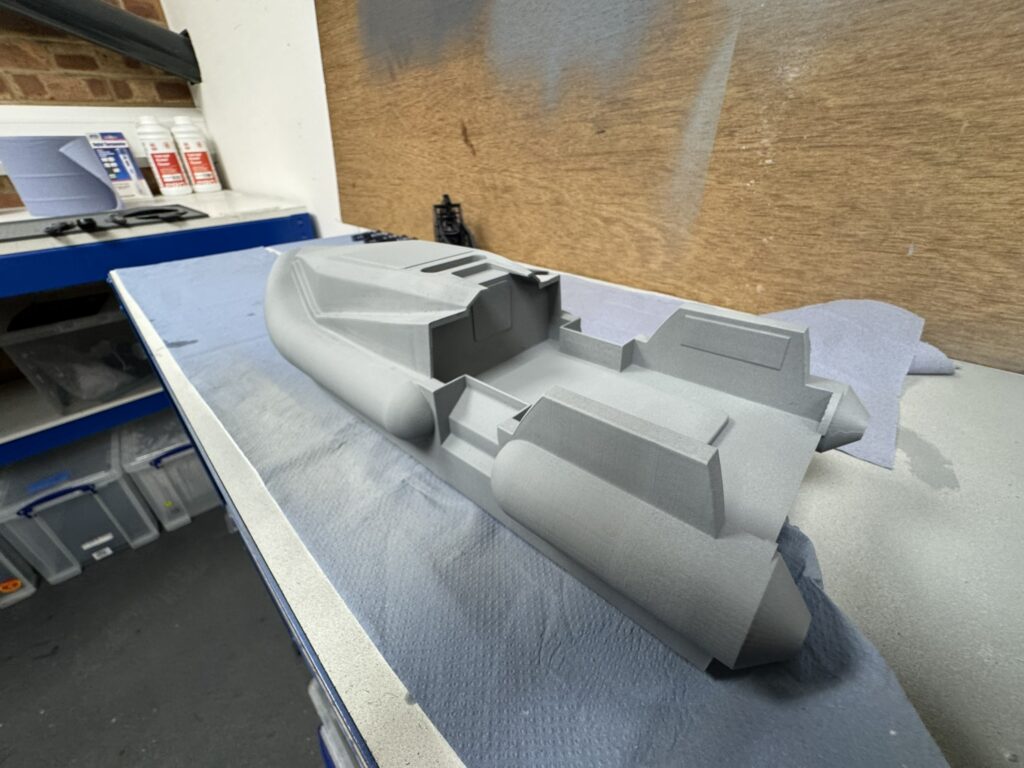
If you’re facing similar 3D printing issues or need advice on printing small or large models, or laser cutting, don’t hesitate to reach out. On top of our personalised catalogue, we can also help you bring your ideas to life – no matter the size or complexity!
